![]() Recently, my social media team asked me to create several vertical videos with captions. Since I can only shoot horizontal video, here’s how I did it.
Recently, my social media team asked me to create several vertical videos with captions. Since I can only shoot horizontal video, here’s how I did it.
NOTE: Unlike both Resolve and Premiere, Final Cut processes all captions locally on your computer. The cloud is not involved. This keeps your projects local and secure.

Record the video using whatever tools you normally use.
NOTE: In my case, I use a Sony a7II DSLR camera for images, an AKG 520c headset microphone, and captured by Telestream ScreenFlow. ScreenFlow allows me to capture video, audio, and my computer screen.
I export ProRes 4444 media from ScreenFlow so that the recorded colors precisely match those displayed on my computer screen. (In this case, I’m only using the video, but my export workflow remais the same.)
I import that video into FCP the same as always and create a new project that matches the video (i.e. 1920 x 1080 horizontal ProRes 4444) and edit as normal.
NOTE: You don’t need to use ProRes 4444 – any video format will work. But ProRes 4444 is the most color accurate and integrates imperceptibly with screen shots and other computer graphics.
CONVERT VIDEO FROM HORIZONTAL TO VERTICAL

Once the timeline is edited, create a copy by right-clicking the project in the browser and choose Snapshot Project.
NOTE: Snapshot makes a truly independent copy. Duplicate leaves multicam and connected clips connected between the original and copied projects.

Go to Window > Project Properties (shortcut: Cmd + J) and click the blue Modify button.

Change Video to Vertical and set the Resolution to the frame size you want to use. There are three choices, as illustrated in this screen shot.
NOTE: The larger the vertical frame size, the more likely your video will look blurry as the video is scaled to fit the frame. For best results, if you shoot 1920 x 1080, select 720 x 1280. If you shoot 3840 x 2160, choose 1080 x 1920. Feel free to experiment to see what looks best to you.

Final Cut creates a vertical timeline, but the video shrinks to fit; which is the default setting of Spatial Conform.
To reframe the video, choose Modify > Smart Conform. Smart Conform is ONLY available when the aspect ratio of the video does not match the aspect ratio of the project.

FCP enlarges, if necessary, the video to fill the frame and changes the horizontal position (Video Inspector > Transform > Position > X) so that the key subject is centered.
There is only one Position X setting per clip. You can modify this setting manually, or add keyframes so that the framing changes during playback. For my videos, I made a few changes, but FCP mostly got it right.
NOTE: The entire video frame is still there, which means it is easy to reposition a shot, if needed.
ADD & MODIFY CAPTIONS

Once the video is reframed, create captions by selecting all the audio clips in the timeline that you want to create captions for.
Then, choose Edit > Transcribe to Captions.

Almost instantly, or at least pretty darn quick, captions appear in the caption track at the top of the timeline.

By default, Apple creates ITT-formatted captions. However, SRT are more widely supported. So to convert between ITT and SRT, select all captions (shortcut: Cmd + A) in the track you want to convert and choose Edit > Captions > Duplicate Captions to New Format > SRT.
NOTE: However, if you want to burn-in captions, leave them as ITT because this provides the most formatting options.
Select all the captions in the track you no longer need and press the Delete key to delete them. (You can also hide the caption track in the Timeline Index, if you prefer.)

Double click any caption that needs editing to open it for correction.
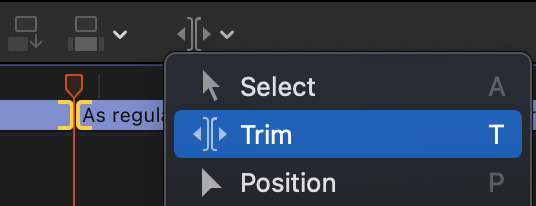
Use the Trim tool (shortcut: T) to adjust the edit point of any caption.
EXPORT CAPTIONS
Once you’ve verified that captions are correct and properly timed, it’s time to export them. Here, you have two choices:
To export captions as a stand-alone file, choose File > Export Captions.

In this dialog, specify which caption track you want to export, and where you want it stored.
NOTE: Stand-alone caption display formats are controlled by the end user, not by the creator. For this reason, I don’t bother to format captions that are exported as a separate file, except for line breaks and corrected spelling.
Click Export when you are happy with your settings. (Personally, unless I’m told otherwise by the distributor, I leave all settings at their default.)mm
To burn the captions into the video:

Make sure all captions are formatted and spelled correctly. Open the timeline you want to export in the timeline, then, in the Timeline Index, make sure the correct caption track is active.
Choose File > Share > Export File.

Click the Roles text button at the top, then click the blue Captions button.
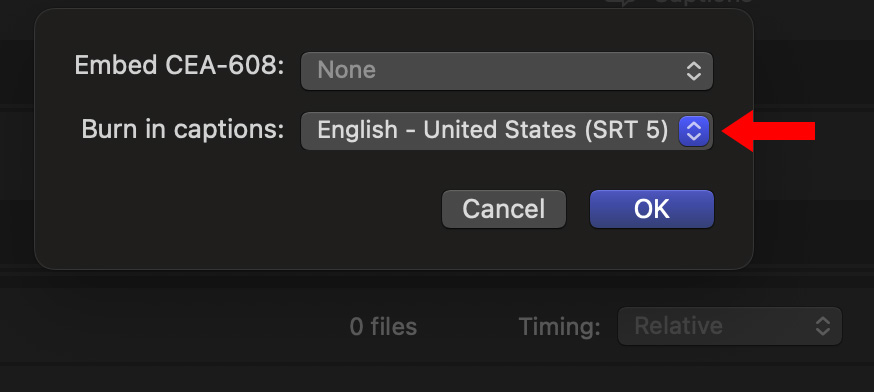
Set this menu to burn in, click OK, and export the project as normal.
SUMMARY
This sounds like a lot of steps, but each step goes quickly and, after you’ve done it once or twice, it quickly becomes fast and easy.

2,000 Video Training Titles
Edit smarter with Larry Jordan. Available in our store.
Access over 2,000 on-demand video editing courses. Become a member of our Video Training Library today!
Subscribe to Larry's FREE weekly newsletter and
save 10%
on your first purchase.
LarryJordan.com is owned by Axle.ai
2018-2025 © ALL Rights Reserved.
